HEIC is a modern photo file type that’s slightly different from JPEG, the universal file format. While both of these formats have their perks, you might need to convert HEIC to JPEG because of the latter being the most commonly used file format. Let us take a look at how to convert HEIC to JPEG on a PC.
How to convert HEIC to JPEG in Windows
In order to convert HEIC to JPEG on Windows 10 in the easiest way possible, all you’ll require is the built-in Windows Photo app. Here are the steps you’ll need to follow.
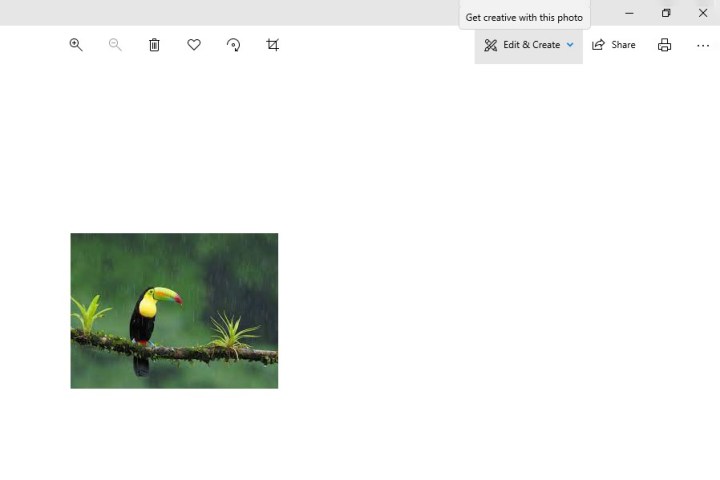
Step 1: Open your file in the Windows Photo app

Go to your file on your PC and double-click on it. It will open up by default in the Windows Photo app.
Step 2: Click on Edit & Create
In the top-right, you’ll see an option that says Edit & Create. Click on that.
Step 3: Click on Edit
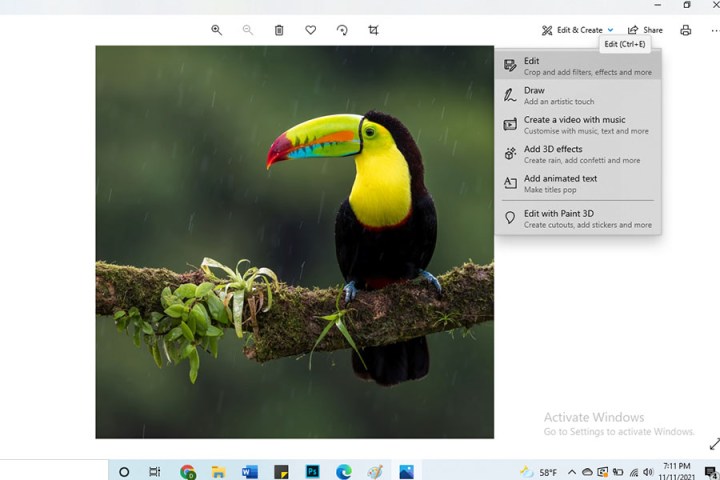
From the drop-down menu that pops up, click on the first option that says Edit.
Step 4: Click on Save a Copy
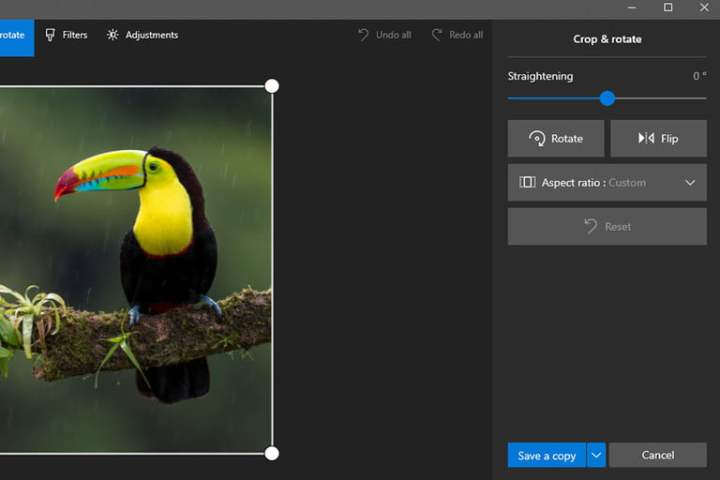
If you want to make any basic edits to the image, now’s the time. You can rotate it, flip it, change its aspect ratio, and add filters or make other adjustments. When you’re finished, select Save a Copy.
Step 5: Choose where to save your image
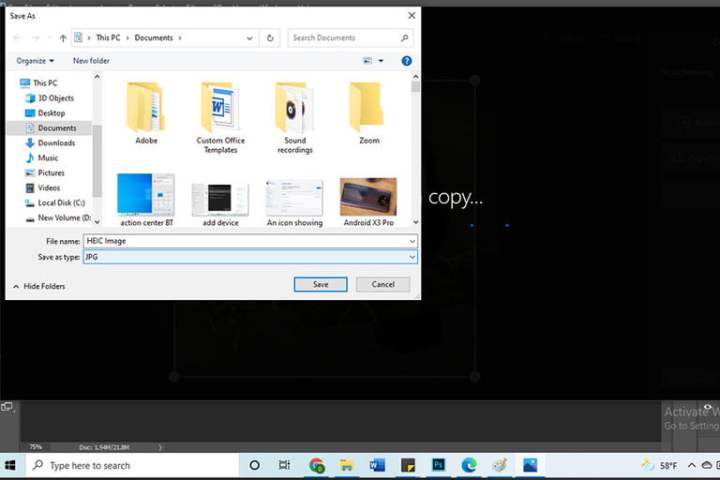
The edited file will be a JPEG image that you can save in a separate folder from the HEIC file. Since both the images are in different file formats, the JPEG file won’t override the HEIC file. You can also keep them in the same folder if you want.
Was this article helpful?
That’s Great!
Thank you for your feedback
Sorry! We couldn't be helpful
Thank you for your feedback
Feedback sent
We appreciate your effort and will try to fix the article